
Project 3P, Part 11: Can You Recondition Hazy Gauges Using Headlight Lens Restorer ... ? (Fiat 128 3P Restoration)

The short answer is no!  However, in fairness to Turtle - whose products I've always found to be very, very good - they never claimed that you could.  The product is called Headlight Lens Restorer, not 46 Year Old Fiat 128 Gauge De-Hazer, which might have been a clue.

In my defence, contemporary headlight lenses are usually made of polycarbonate - a plastic - and the gauges are mounted behind what's likely to be perspex, which also belongs to the broader plastics family.  Couple this with the not unreasonable theory that the degradation often seen on headlight lenses and similar transparent items is due largely to the ravages of ultraviolet light and it doesn't seem too far fetched that the one product - headlight restorer, in this case - might be able to kill the two birds, as it were.

Anyway, I've now debunked that bit of wishful thinking.  I happily admit that I was wrong.  30 minutes' of slavishly following the directions failed to so much as slightly mitigate the cloudiness of even the smallest of the gauge lenses within P3P's instrument cluster. It was, however, worth a try!  I also learned how to remove and dismantle the whole assembly, as follows:  


The cluster is secured to the dash by two screws, the holes for which are shown at the extreme left- and right-sides of the photo above.  Once they're undone, all that's required is to lift the cluster from below, tilting it upwards, and to disconnect two wiring blocks and undo the collar around the speedo cable.  (It might also be worth somehow securing the collar in place, unless you want to go hunting for the bleepin’ thing when it inevitably slides down the cable and into the cavity below the dashboard!)  

Above and below:  speedo cable at 9 o'clock; one wiring block at 12 o'clock; and the second at 4 o'clock.  The screw holes are also visible in the top corners of the left and right bat wings. 
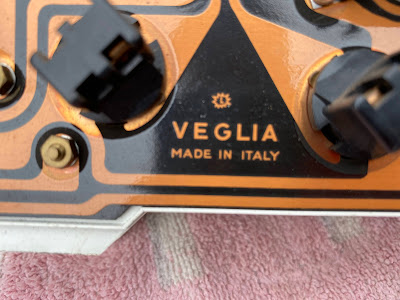

The flip-side.


All the gauges were more heavily hazed towards their lower sections, adding weight to the damage by UV theory.


The off- and near-side gauge fascias were the easiest to remove; it was simply a matter of gently prising them free of the main cluster with with a flat-bladed  screwdriver and the special 46 year old Fiat 128 gauge removal tool on my Swiss Army knife.  However, extracting the lenses from the fascias was more difficult.


To free the lenses, I used a scalpel to separate the fascias from their backing pieces by carefully cutting off the head of one of the three factory-melted plastic tabs that held the two components together.  I chose the head of the tab shown at the six o'clock position on the image above, allowing the fascia to pivot away from the backing, making the lens accessible and easily removable.  The photo below shows a tab head in more detail.  

Having failed dismally to render the gauges legible again, I'll try to secure a clearer set from The Cache but, if not, will cast the net wider and see what I can find.  I may even see if I can't at least have the small, flat lenses of the water temperature and fuel gauges remade but I'm less confident that it's going to be simple to do the same for the larger instruments - those of the speedo and tacho - because they feature a horizontal curve across their faces.  This is a bit of a conundrum and why I haven't yet even tried to separate these bigger lenses from the rest of the cluster.

Hazy A-F but free of the gauge.

The treated lens is shown on the left of the image above.  As you can see, there's no discernible improvement between it and the untreated one on the right.  The perspex is either UV damaged all the way through or it's somehow not amenable to Turtle's product.  


As an interesting aside, it looks like the cluster's been out for repair before.  Although I can't see what might've been fixed or replaced, it appears that whoever did the job was proud of their handiwork, having signed the top of the unit (please see the image below).  It's hard to discern what the autograph actually says.  However, I'm tending towards S Gowie or something along those lines.  

It's a fair bet that the signature's author was an employee of Davies Brothers - Launceston's only Fiat dealership - or maybe a local auto-electrician or specialist instrument technician.  If anybody's got any leads as to who this person might be, please, please let me know via the comments section at the end of this post.  It'd be fascinating to learn his or her identity! 


Screwdriver and the Swiss Army special 46 year old Fiat 128 gauge removal tool.

Did you enjoy this post?  If so, why not check out Parts 1 to 10 of Project 3P?  Even better, how about browsing the rest of the uppermiddlepetrolhead site?  There are loads and loads of classic, sports and performance car photos and articles, most set against a backdrop of fabulous Tasmanian scenery!


U M P H

(uppermiddlepetrolhead.blogspot.com.au.)

All iPhone images.


Comments

  1. I replaced the foggy instrument lenses in my 128 3P with off-the-shelf polycarbonate or perspex sheet I cut to size myself. For the curved pieces I just heated it gently and bent to the required shape. This was in 1988 so I'm a bit "foggy" on the details.

    ReplyDelete
    Replies
    1. 🤣. I guess that would’ve been my next step, had I not been put onto Alistair. Perspex is fiddly to cut - at least for the smaller gauges - so I admire your skill.

      Delete

Post a Comment

Popular posts from this blog

EJ or EH Holden? (Up-dated December, 2022)

EJ or the later EH? Several years ago, I posed the question:  Can somebody please explain the difference between an EJ and an EH Holden ute or van?  The response at the time wasn't overwhelming, so I did a bit of Googling and ferreting through my photos and came up with my own rough guide to EJ and EH identification.  Sedans and wagons are easy to tell apart ;  the EH's vertical rectangular tail lights are a dead give-away.  However, the workhorse versions of both models share the rear-end treatment of the earlier EJ, making it harder to identify one from the other.    No super obvious hints here. Or here ...  . It turns out that the main clues are in the placement of the front   H O L D E N   lettering and GMH lion emblems, the style of the radiator grille and the width of the vents in front of the windscreen, with all EJs - sedans, wagons, utes and vans - having one combination and the EH line-up having their own . So what exactly are those diffe

Vick Auto Prima Fiat X1/9 Brakes: An Owner’s Assessment

At the end of 2022, I fitted a set of Vick Autosport Prima front brakes to my mildly worked 1.5 litre Series 1 Fiat X1/9 . I was fortunate, having picked them up at a very, very reasonable price, brand new but surplus to the needs of a fellow X1/9 Australia member who had imported them from the US. The kit included: New single pot callipers , new vented rotors (standard X1/9 front rotors are smaller, non-vented items), DOT approved stainless steel brake hoses, and all the necessary mounting hardware. They are a value proposition, being particularly well priced compared to other manufacturers’ packages - even at RRP - with everyone I’ve spoken to saying they’re made to a high standard, too. Here's a link to a piece that I wrote about them at that time, including some costings: https://uppermiddlepetrolhead.blogspot.com/2022/11/the-x19-gets-prima-brake-upgrade.html . Initial Assessment: I was a little underwhelmed by the brakes' performance, finding that although they had a tiny

Random # 301: Nanna-Spec KE36 Corolla

  Once upon a time - six or seven years ago, actually - there was a lovely pale yellow GC Galant station wagon getting around Hobart.  It was totally nanna-spec; its paint was umarked, the chrome work and hubcaps were immaculate, and its very original interior was pristine. Then someone stuck feathers in its dashboard.  Next, the windows were adorned with Tibetan prayer flags.  And a hubcap went missing.  And the the rear bumper was pushed in, mangling the bodywork behind it.  And a mudguard got dented.  And rust set in.   I fear for this sweet, innocent KE36 Corolla.  Somebody please save it before it's too late.  Nanna needs you to do it. U M P H (uppermiddlepetrolhead.blogspot.com.au.) Photos by GlamRock.