Project 3P, Part 8: More Mammoth Morsels (Interior Trim Removal and Repair / Fiat 128 3P Restoration)

The main benefit of following the Elephant Eating School of Car Restoration should be obvious: not biting off more than you can chew! As an amateur with only basic skills, a modest tool kit and no workshop of any consequence, I do try to keep my tasks down to manageable chunks so that I can celebrate my occasional wins, not get too hissed-off when I c*ck things up and I don't find myself having too many WTF moments!
I admire the intrepid bare-metal, nut and bolt restorers and resto-modders - especially the D-I-Yers - I really, really do, but am faint of heart by comparison. And kinda lazy, too. Weekend jobs are more my thing; half-dayers if I think I can achieve something worthwhile in such a short timeframe.

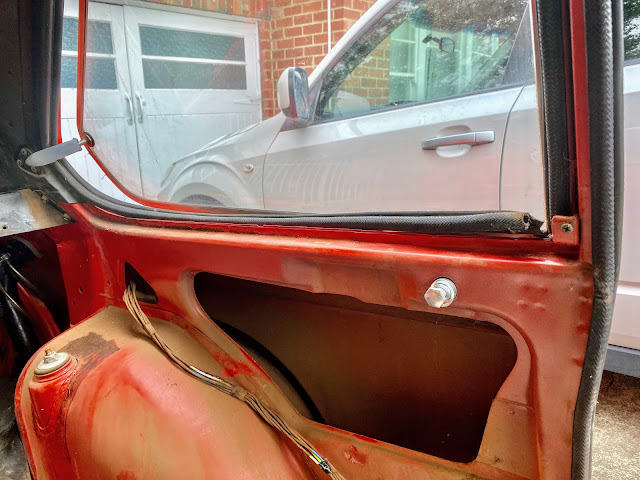
Staying true to the elephant-eating philosophy can, however, be easier in theory that it is in the real world. Example: new seat belts were required for P3P. Their removal meant that the rear trim had to be taken out, too. It had a few cracks, so time to fix them. Whilst removing the trim, it became apparent that the window rubbers needed replacement. And there was rust to be treated. And the cavities between the trim and exterior panels needed a good clean up. And ... . Get the idea?

Rust annoys me! Even shitty surface-only rust like I found under the trim, so that got wire-brushed back to clean metal and given a good dousing of fish oil. This had the advantage of allowing plenty of time for my favourite rust inhibitor to set before reassembly.


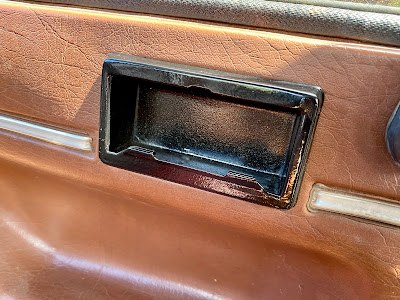
I forgot to mention that the rear ashtrays looked a little sub-par, too. They got rubbed back and repainted with fresh black satin paint.


The backs of the trims had a film of very, very fine red dust on them, which also extended into the cavities behind them. I reckon the car’s seen a few country roads in its time. Thanks to that, the job now also entailed some serious brush and Dyson action to get rid of it because I’m only planning on having the trims out once!

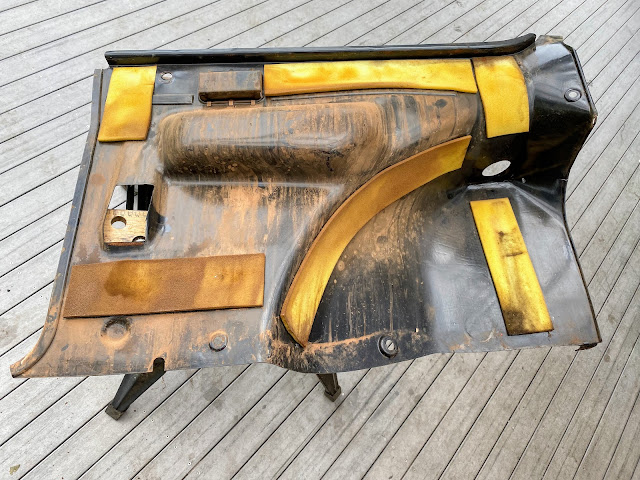
To repair the cracks in the trim, I resorted to a technique borrowing heavily from fibreglass repair. Most of the cracks - like the one below - snapped back into place quite easily, making it fairly hard to see where they'd been. However, it seemed likely that the first time someone leant against the trims or a hot day caused a bit of expansion, the cracks would reappear.
 |
| Outer face. |
 |
| Above and below: inner face. |

 |
| Crack realigned and surface roughened up. |
It was clear to me that the cracks needed to be glued or somehow bonded together to ensure that they didn't open up again. But how? The mating surfaces were way too thin to glue end to end and I don't have a plastic welding kit, either.
What I did was to roughen up the rear of the cracked area with sandpaper, to ensure good bonding, before applying superglue to the sanded surface. Then I placed a small patch of light-weight woven cotton / polyester torn from an old shirt over the superglue, then let it soak through in the same manner as resin is applied to patches of chop strand or woven fibreglass matt. This bound the two sides of the crack together, ensuring that they won't break apart.


And the new window rubbers? Too much to chew on for one day! But I'll get there ...
eventually!
Next time on P3P: marinated elephant!
U M P H
(uppermiddlepetrolhead.blogspot.com.au.)
iPhone images.


Really enjoying your journey with this Al. Have a great Christmas.
ReplyDeleteThanks, mate! Cheers for your Christmas, too!
Delete