The Curse of the "Last Job": Wonky Window Winders and Dodgy Door Locks

I don't love my Fiat X1/9 at the minute. To be honest, I'm not sure that I even like it. It has a malevolent spirit, you see, beguiling me with its Italian good looks, symphonious induction noise, sweet exhaust note, and crisp handling.
My Exxie lets me believe that it reciprocates my affections and appreciates the time, effort and abundance of cash that's been lavished upon it. My X1/9 has all the depth of character of a cat!
So, what's brought us to this nadir? A silly thing, really: a tiny, cheaply cast alloy part broke, rendering the driver's window winder inoperative, the handle no longer able to mesh with the mechanism. It was 43 years old. No cause for complaints there.
This ordinarily inconsequential part broke within minutes - seconds, actually - of me having backed the X1/9 up onto ramps, ready for me to replace the speedometer cable. The final thing on the list, that mythical "last job" that was within my own limited abilities to fix, before the car was sent away for its five-speed upgrade and Gulf orange paint job. That's what's xxxx-ed me off!
A new winder mechanism was sourced and fitted, as per the instructions in the workshop manual. I went to lower the window, the cable unspooled and wouldn't wind back in, leaving the window stuck again. The instructions were re-read and the process repeated. Once. Twice. And a third time, just for fun. There go two afternoons that I'll never get back.
A now absent door card (most of the clips that were recently bought from M-WB shattered upon removal), the resultant drafts and sight of water hissing into the door innards every time it rains, plus all the rattles from the untensioned winder pulleys, has also helped to kill the love! I'm not that keen on the length of wood and the flat-bladed screwdriver that now keeps the window permanently up, either! AND I still haven't replaced the speedo cable!
_________________________________________________________
Then I noticed a threaded metal shaft hanging uselessly in the vague vicinity of the inside part of the driver's door lock. Ah, I thought to myself, that's why the key won't engage with the lock. However, there's nothing in, on or near the lock that appears to have anything to do with the key and / or its barrel.
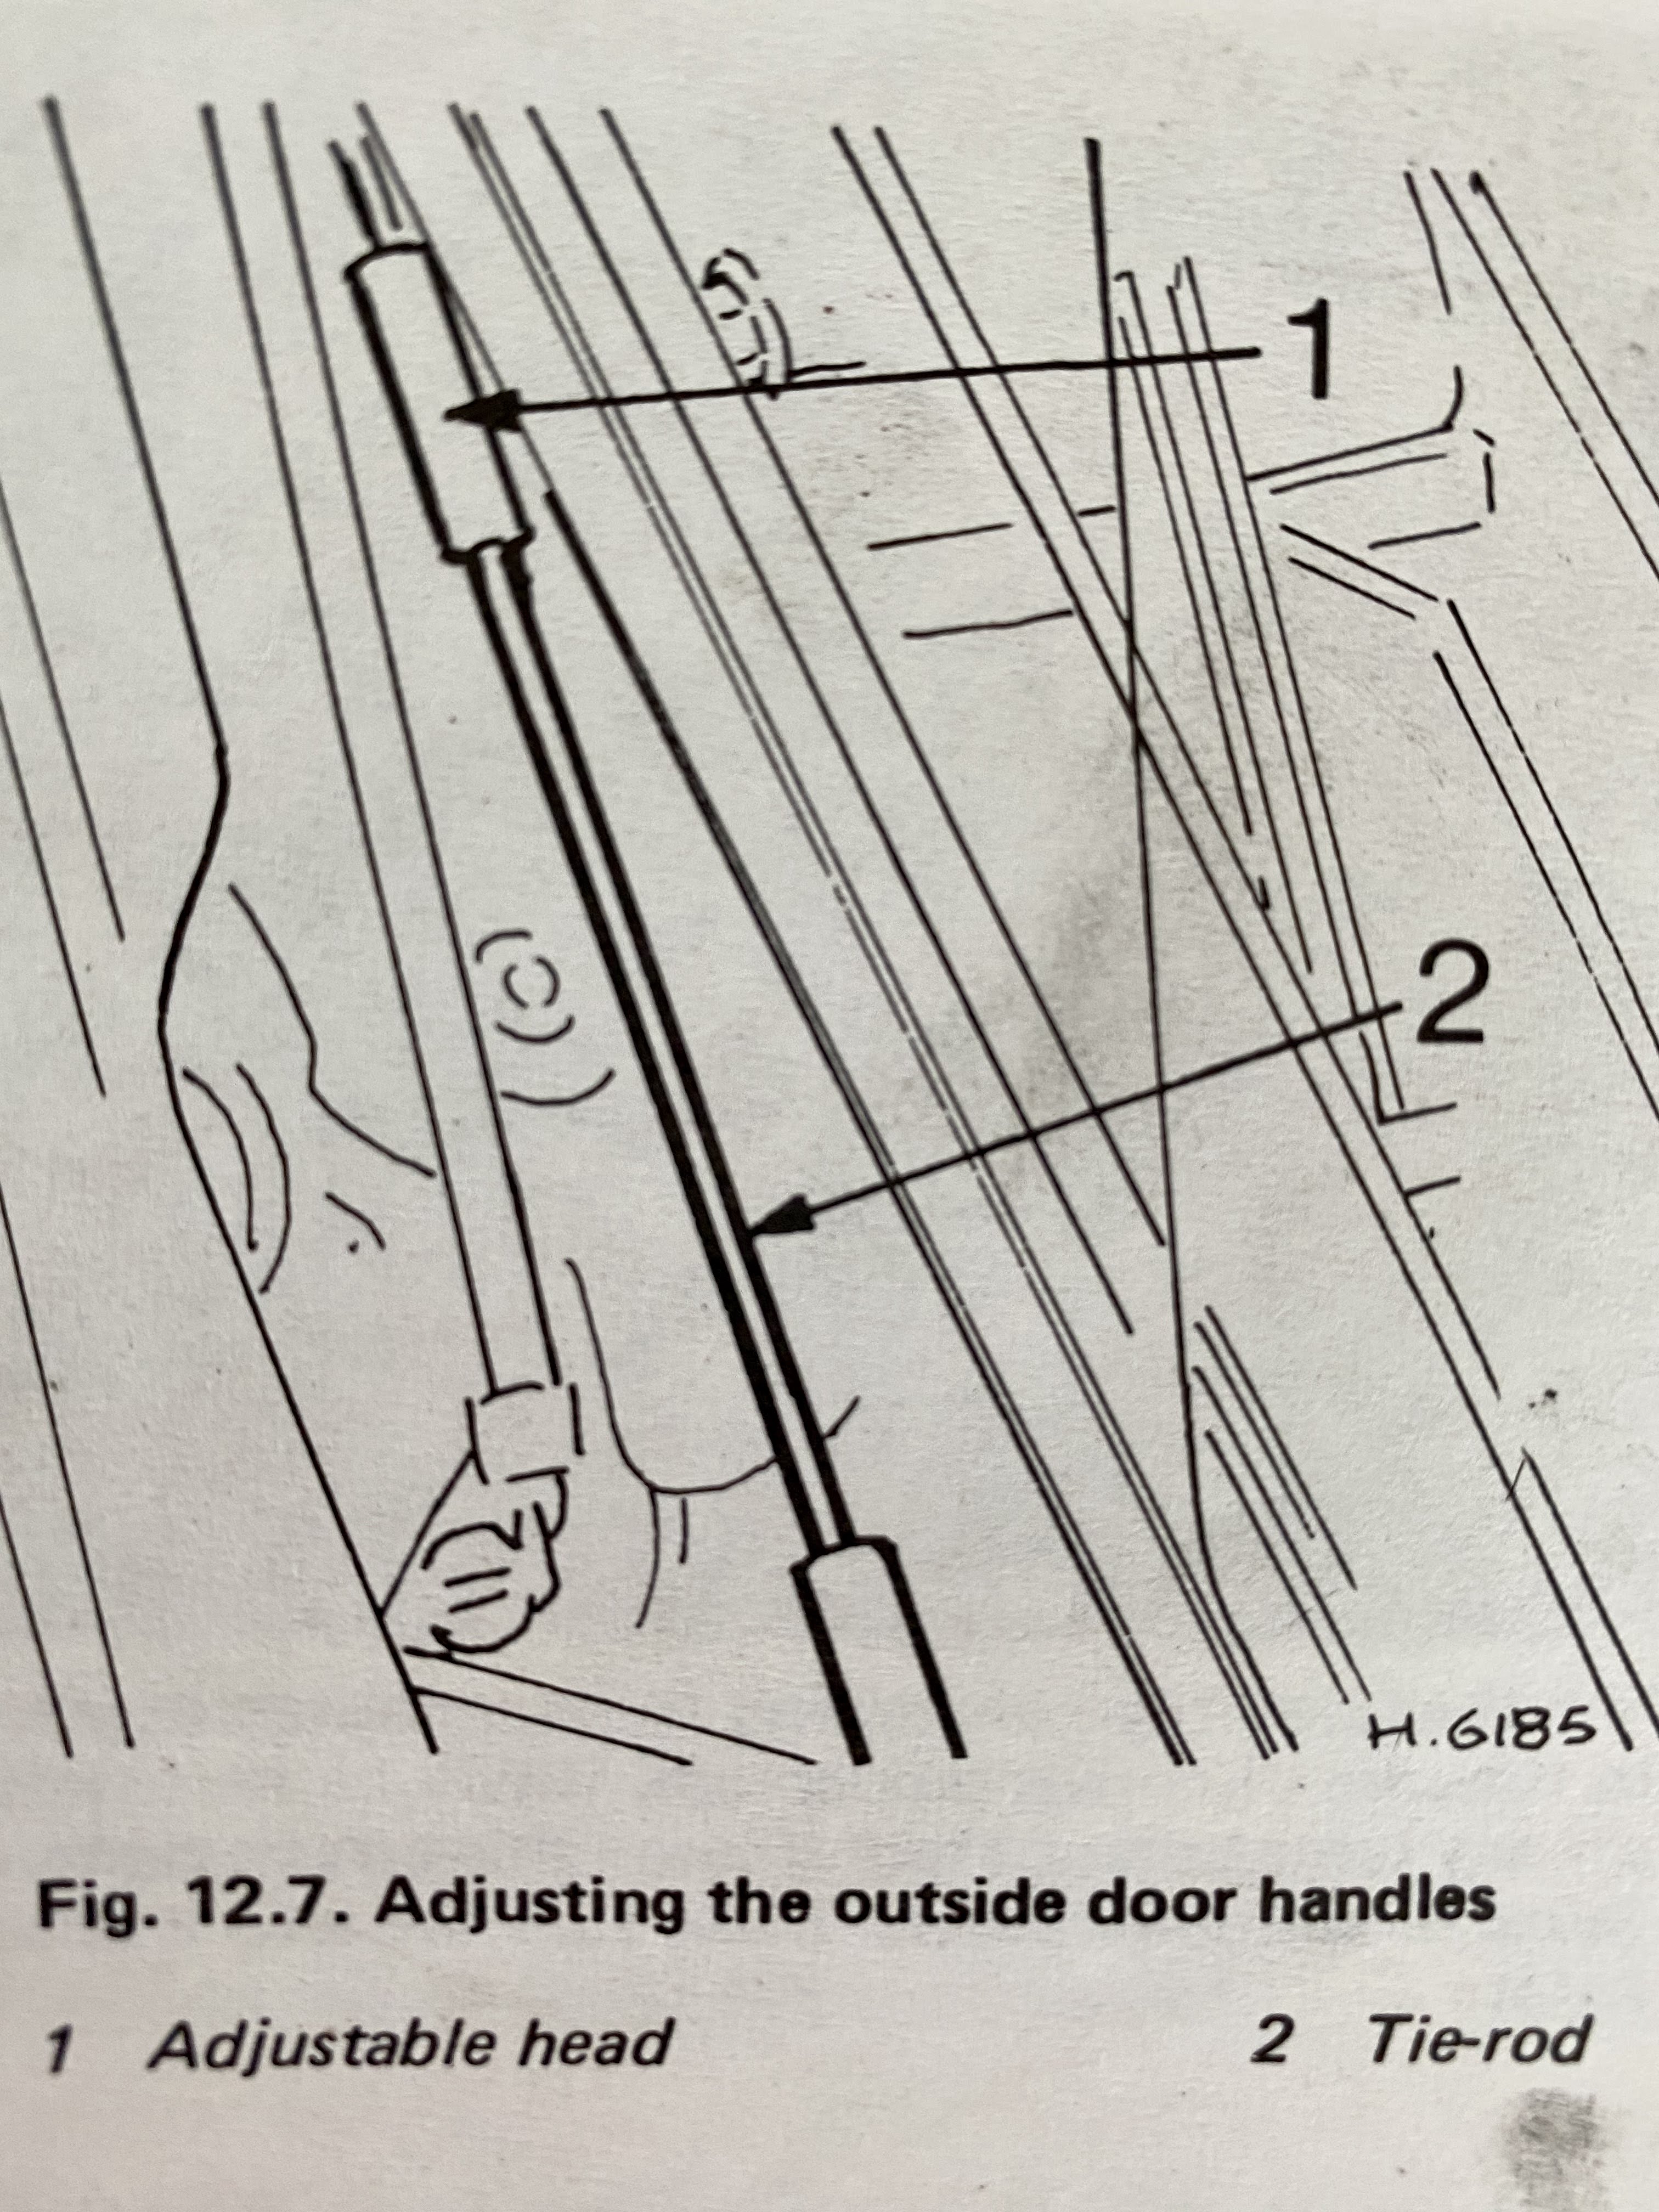
This threaded shaft is marked on the diagram below as part # 24, a "rod," and in figure 12.7 it's described as a "tie rod" with an "adjustable head." Its other end - the not-adjustable-head or maybe just its foot (?) - ultimately connects to the interior door handle but, interesting as this fact is, it still hasn't helped me work out where it attaches to the exterior door handle and / or lock.
The workshop manual's instructions are of no assistance, either; the sum of their wisdom reads: "to adjust the exterior door handle, turn the adjustable head of the tie rod (Fig 12.7)." However, there's no mention where or what the tie rod ties to. Not helpful!
There's one squared-off section on the upper arm of the interior door locking mechanism that sort of looks like the tie rod could attach to it. There is, however, nothing that confirms this to be what it's for; there isn't anything to hold the tie rod in place or that shows what benefit would be achieved if it did. It more than likely has sod-all to do with it.
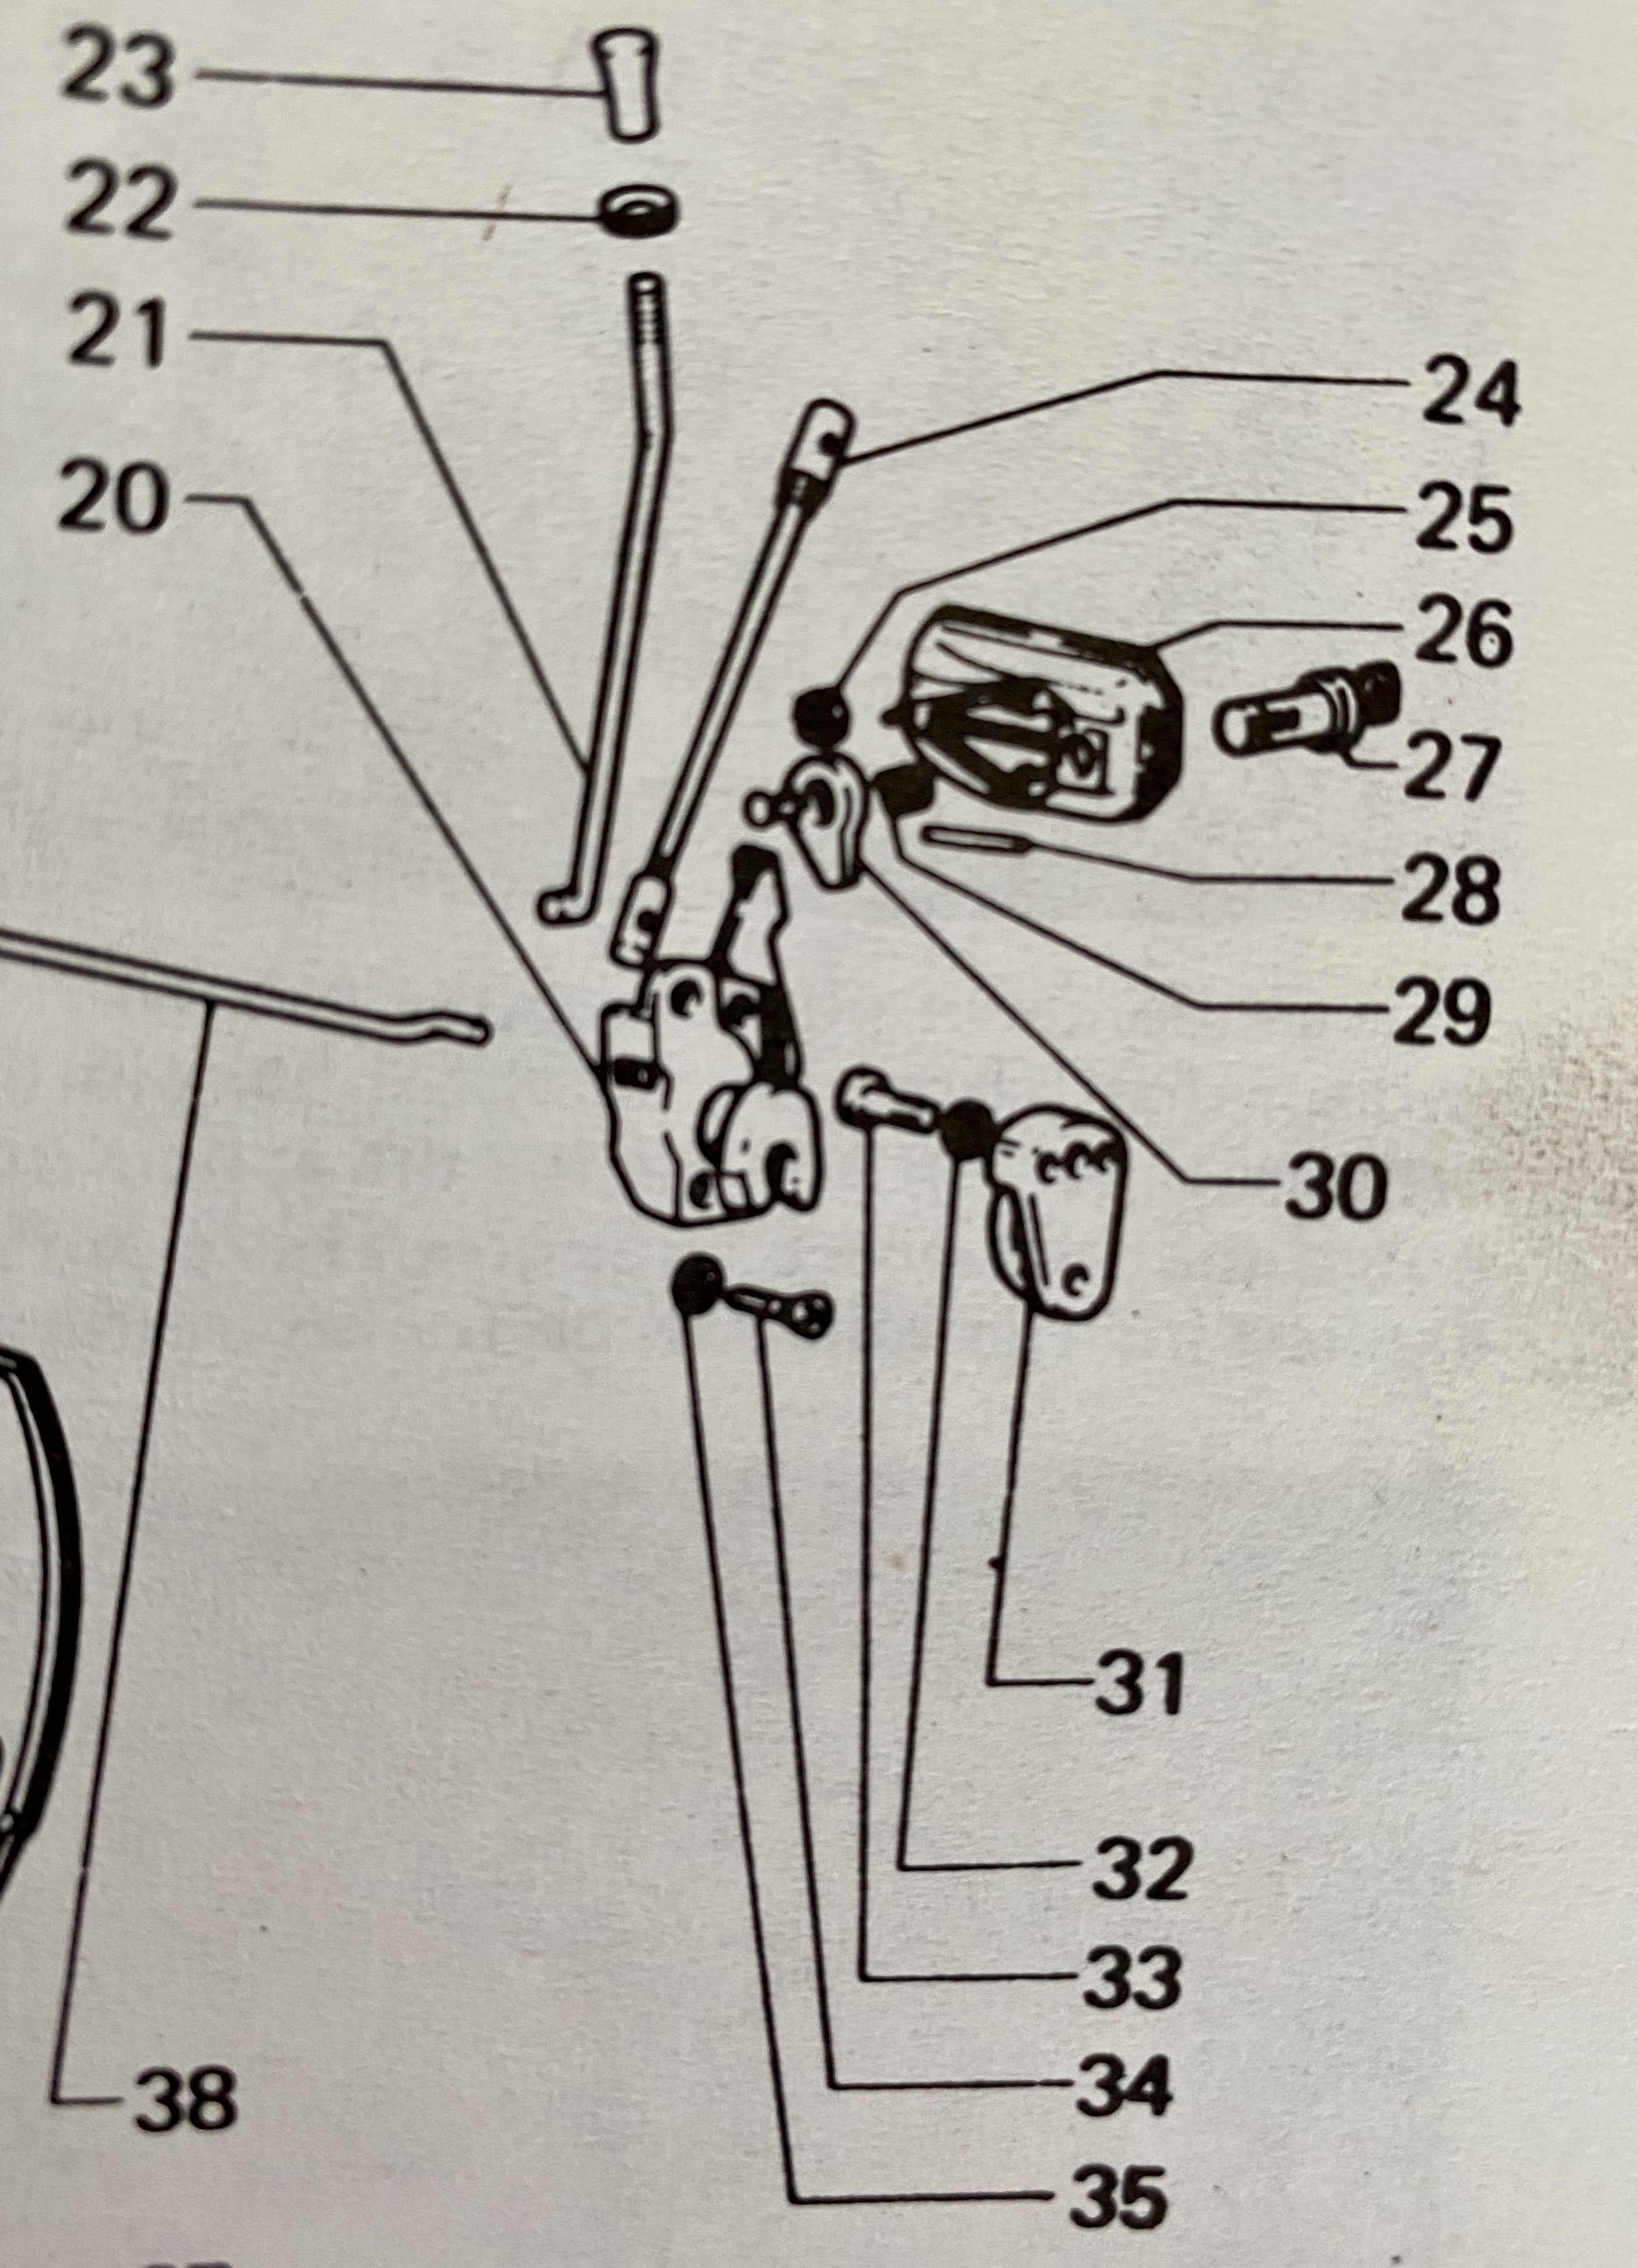 |
| The mysterious part # 24. |
 |
| Ah! An adjustable head, eh? |
 |
| The adjustable head is shown in the lower left corner of this photo. The slightly out of focus thing that looks a lot like the adjustable head, and that's visible in the photo's top right, is where the tie rod attaches to the interior door handle assembly. |
 |
| The circled thingy is where the foot of the tie rod attaches to the interior door handle. |
 |
| A close-up of the thingy. |
 |
| The tie rod (adjustable head at the top & the threaded bit that winds into the thingy on the photo's bottom). |
 |
| Here, somehow, maybe ... ? |

 |
Does the protuberance on the back of the lock-cam (top left of picture) have anything to do with the tie rod? Are they meant to somehow connect? |
 |
| Close-up of protuberance. |
 |
| Even closer-up of protuberance. |
So, can any of the Exxie Brains Trust please explain:
- Why is my window winder unspooling? (I've considered that it may have something to do with the window tracks being out of alignment or maybe in need of some lubrication. It might even be the wrong side winder but I'm unsure how that'd affect the process.)
- How can I rectify the window winder problem?
- Where, what or how does the tie rod connect to the exterior door handle?
- Does anyone have illustrations and / or instructions that are more helpful than those contained in the Haynes Fiat X1/9 1974 to 1980 workshop manual?
- W T F am I doing wrong?
Any advice / resources gratefully received!
Thanks in advance. 🤞.
Alastair
(uppermiddlepetrolhead.blogspot.com.au.)


Comments
Post a Comment